Applicazione e formazione
Senza maglie
RAGGIUNGERE LA LIBERTÀ DI MANOVRA CON LA SERIE H E LA SERIE ELITE
(CURA TERMALE)
Dopo l'applicazione di uno strato di Cerakote, i pezzi vengono sottoposti a un lavaggio ambientale e messi in un forno preriscaldato a 150°F-180°F. Il tempo di assenza di tack sarà raggiunto entro 10-30 minuti, a seconda del colore e della densità del substrato; questo processo per raggiungere l'assenza di tack è noto come Polimerizzazione flash.
COME VERIFICARE L'ASSENZA DI VIRATE
Dopo aver rivestito i pezzi e averli messi in forno per la polimerizzazione flash, impostare un timer per 10 minuti. Dopo i 10 minuti di polimerizzazione flash, verificare che il pezzo sia privo di tack usando il dito e premendo leggermente la superficie in un punto poco visibile. Se il pezzo è ancora appiccicoso e lascia un'impronta, continuare a controllare ogni 5 minuti finché non rimane più alcuna impronta.
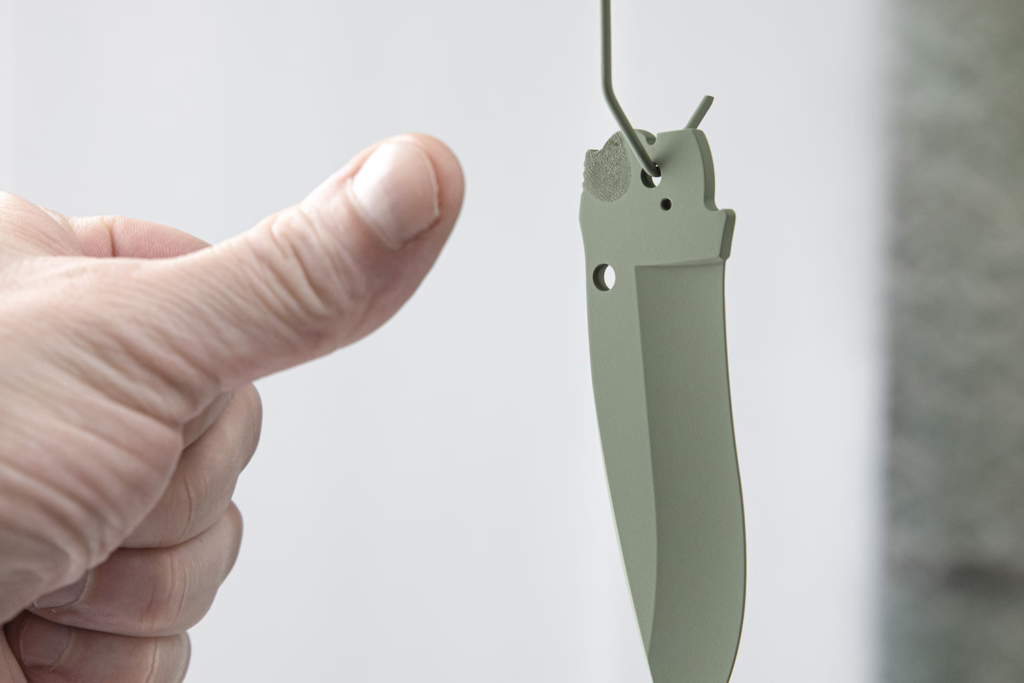
PARTE SOTTOFLASHATA, IMPRESSA DAL TEST DI PRESSIONE DELLE DITA.
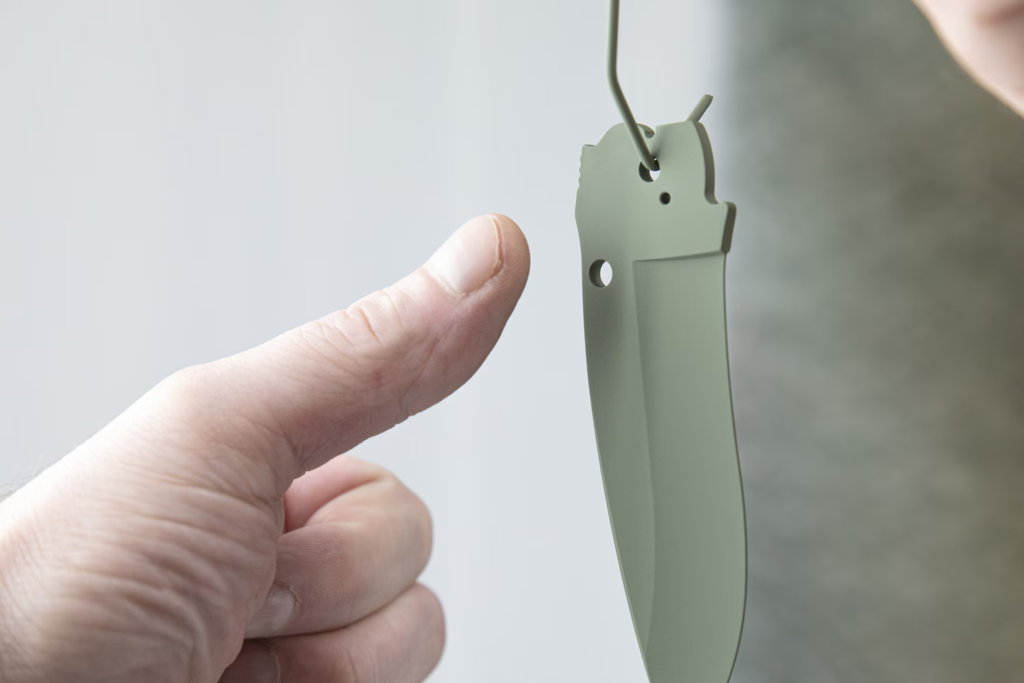
PARTE POLIMERIZZATA IN MODO DA NON ESSERE APPICCICOSA
Una volta privi di Tack, togliere i pezzi dal forno e lasciarli raffreddare prima di maneggiarli o aggiungere altri strati di rivestimento.
OTTENERE L'ASSENZA DI ADESIVITÀ CON LA SERIE C E LA SERIE GLACIER
(CURA DELL'ARIA)
Dopo l'applicazione di uno strato di Cerakote, i pezzi vengono sottoposti a un lavaggio in ambiente fino al raggiungimento del Tack-Free. Il tempo di assenza di catrame sarà raggiunto entro 45-60 minuti, a seconda del colore e delle temperature ambientali.
COME VERIFICARE L'ASSENZA DI VIRATE
Una volta applicato lo strato finale, impostare un timer per 45 minuti per consentire alle parti di fare un flash ambientale. Dopo i 45 minuti di appassimento ambientale, controllare che il pezzo sia privo di tack usando il dito e premendo leggermente la superficie in un punto poco visibile. Se il pezzo è ancora appiccicoso e lascia un'impronta, continuare a controllare ogni 5 minuti finché non rimane alcuna impronta.
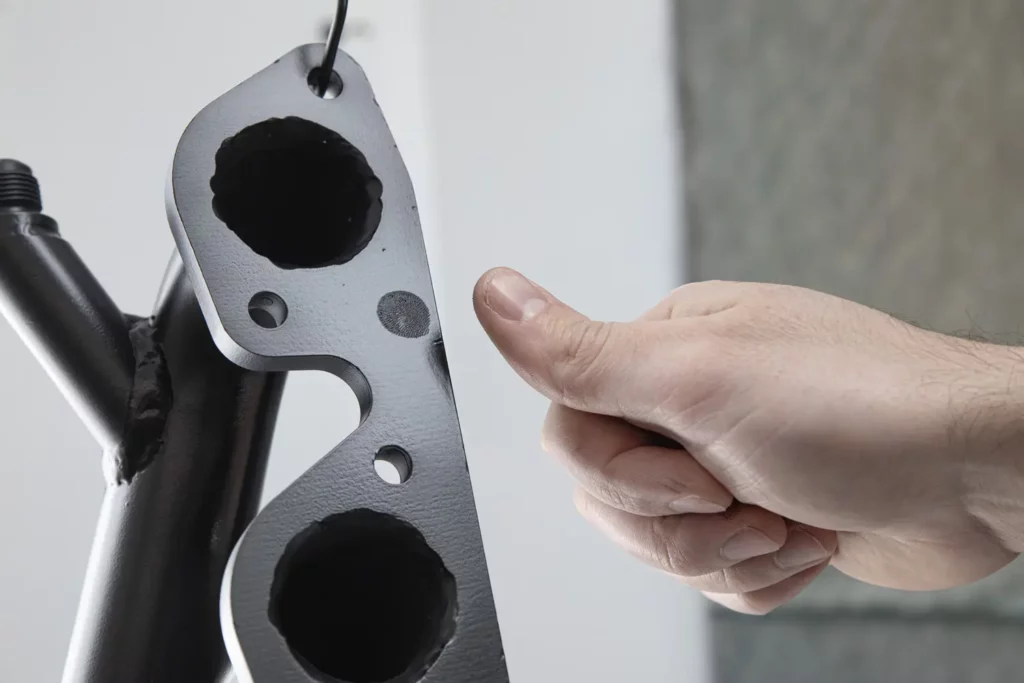
PARTE SOTTOFLASHATA, IMPRESSA DAL TEST DI PRESSIONE DELLE DITA.
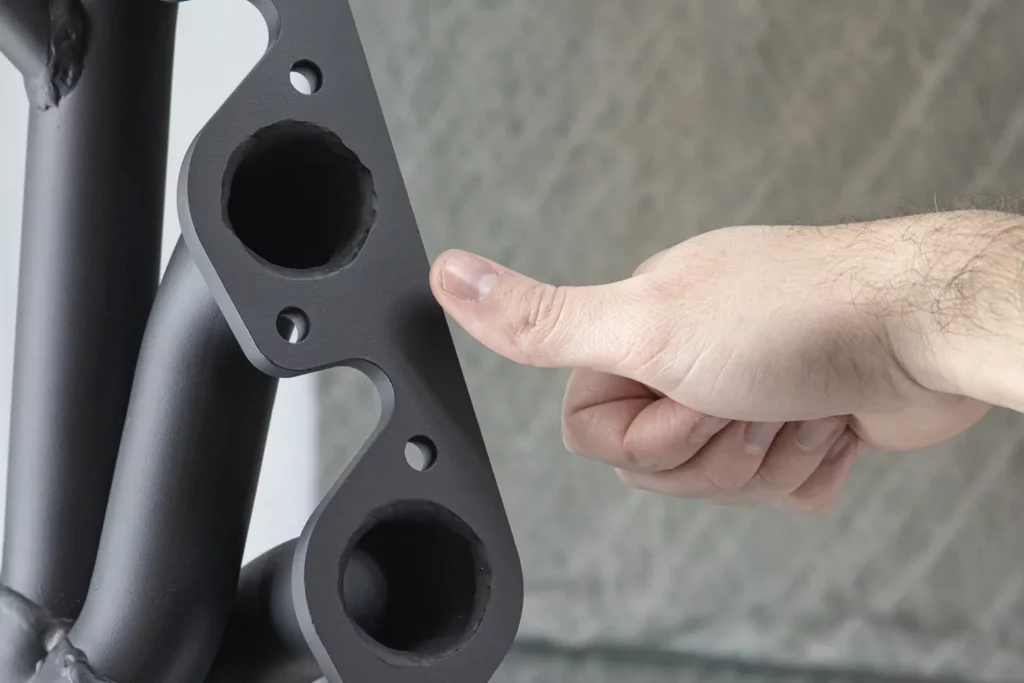
PARTE SOTTOFLASHATA, IMPRESSA DAL TEST DI PRESSIONE DELLE DITA.
Una volta privi di tacche, i pezzi sono pronti per essere manipolati o per l'aggiunta di ulteriori strati di rivestimento.
QUANDO È IMPORTANTE RAGGIUNGERE L'ASSENZA DI VIRATE?
PERSONALIZZAZIONE
ADESIONE TRA I RIVESTIMENTI
Quando si stratificano i colori in progetti personalizzati, è indispensabile verificare il Tack-Free tra uno strato e l'altro per ottenere un'adesione ottimale tra le mani. Se si lascia polimerizzare il rivestimento oltre il Tack-Free, l'adesione tra le mani può risultare scarsa.
APPLICAZIONE DI STENCIL IN VINILE
Durante il processo di stratificazione del colore, è necessario ottenere l'assenza di adesività quando si aggiungono o si rimuovono gli stencil in vinile. Se un pezzo non è privo di adesività, si possono verificare difetti di finitura o delaminazione del rivestimento.
MANIPOLAZIONE
Se un pezzo non è privo di adesivi prima della manipolazione, si lasceranno impronte/difetti che saranno presenti una volta polimerizzati. Assicurarsi sempre che il pezzo sia privo di adesivi prima della manipolazione.
